Family sharing is one of the best features that you can use if you’re an Apple user. In this way, you can share a lot of Apple device features with your group of people.
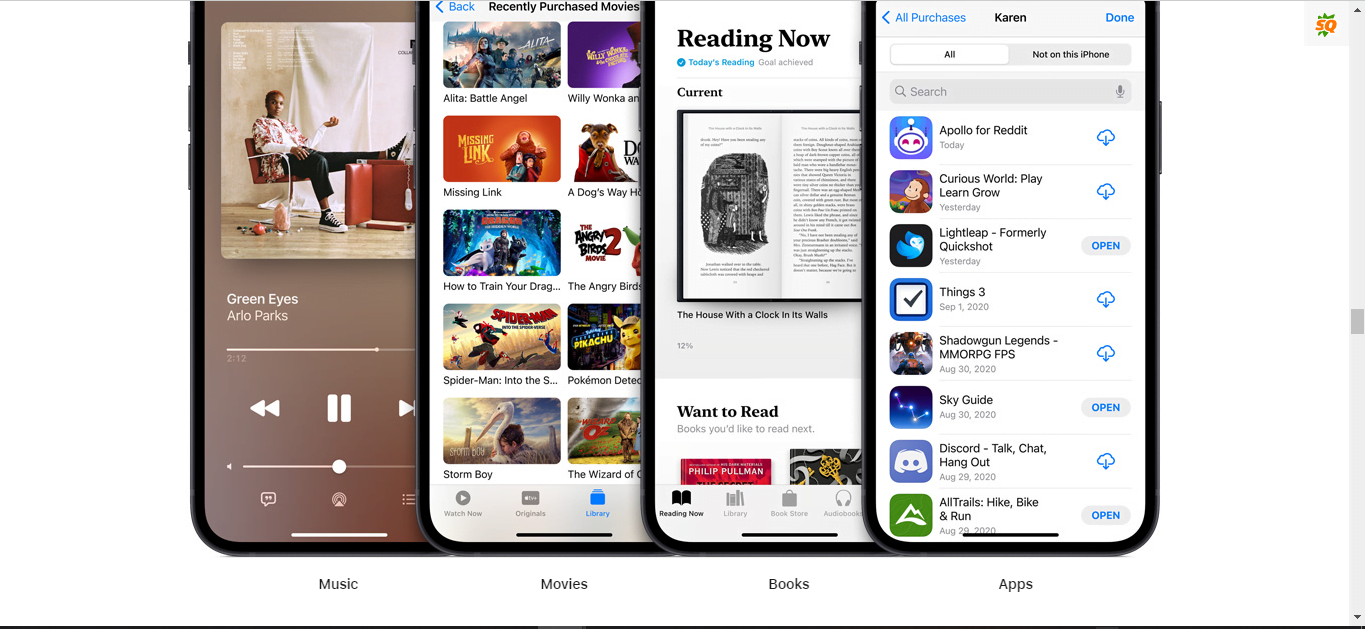
You can share iCloud+, Apple Music, Apple TV+, Apple Fitness+, Apple News+, and Apple Arcade with 5 more people in your family provided they have an Apple device.
The family sharing feature can also help you to share iTunes, Apple Books, App Store purchases, and a family photo album. You can even help each other to locate each other Apple devices.
If you’re an organizer of your family member then you can share an invite link with other family members and can invite them to come and share the files with each other.
Make sure, the family members can only see the files you allow.
If you want to read in detail about family sharing then stay with me and I’ll explain everything you need to know about family sharing on Apple devices.
Read more:-
Connect My Samsung Phone To My Tablet
Here are the steps to set up a family sharing:
There are basically two options, one, you can create a family sharing group and share the invite link with your family members and if they join it they’ll be eligible to view the sharing items on your Apple device.
Second, you can join someone else sharing group.
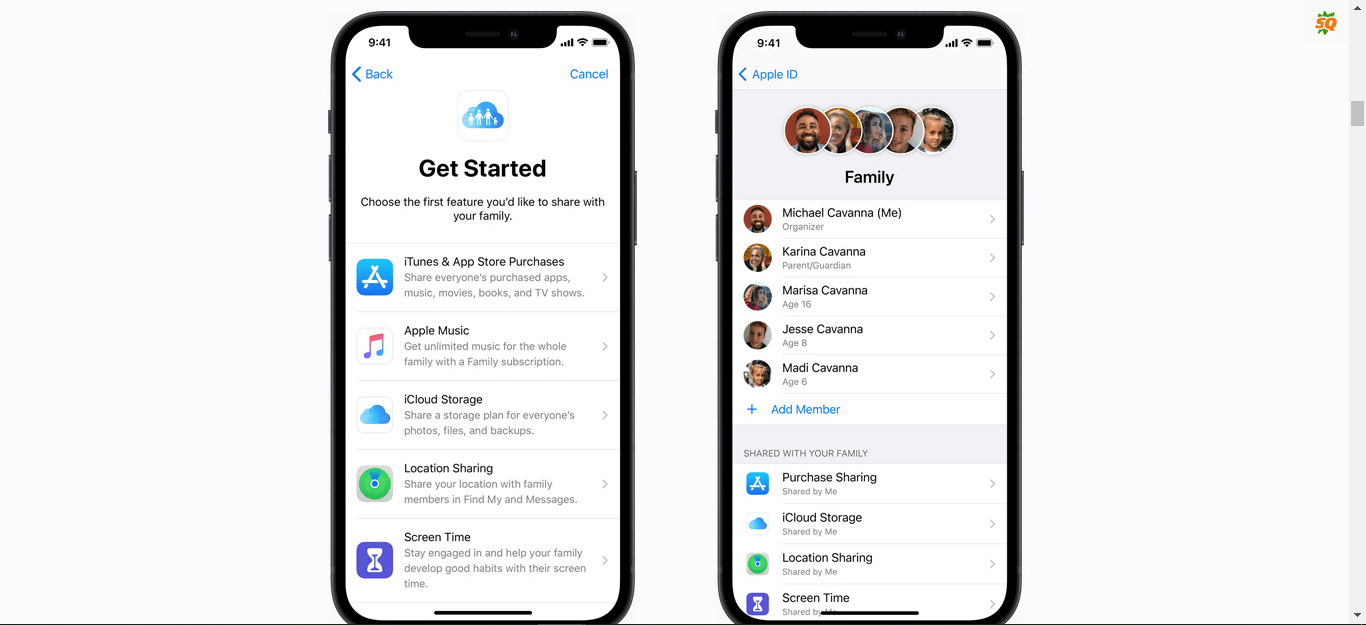
Let’s take the first option, suppose, you’re an organizer of the family sharing group and you decided to create a family sharing group then you need to follow certain steps in your Apple mobile in order to set up the family sharing feature.
1. First, you need to go to your device settings.
2. Then click on your name.
3. Now, click on the family sharing, and then you need to hit the set up the family sharing option.
4. Make sure to follow the on-screen instructions and that your family sharing group is ready to share with your family members.
If you’re a MAC user then these steps may be as given below:
1. First, you need to click on the apple icon as you can see on the screen, and then click on the SYSTEM PREFERENCES.
2. Here, you’ll find the family-sharing option. Make sure to click on it.
3. It’ll ask you to provide your Apple ID, make sure to provide it and follow the on-screen instructions.
Once you’ll go with these steps you’ll set up the family-sharing feature.
If you’re using macOS Mojave or earlier:
1. Choose Apple menu > System Preferences, then click iCloud.
2. Confirm the Apple ID that you want to use for Family Sharing, and make sure that Share My Purchases is selected.
3. Follow the onscreen instructions.
Once you’ve set up the sharing invite link, now, there are certain steps that you may need to take in order to invite people into your family sharing group.
For mobile, iPod, iPad:
1. Once you’ve set up the invite link you need to share the link with your family members. If your family member is a kid and doesn’t have any Apple ID then you can create a new one for the kid.
2. If your kid has an Apple ID then you easily send the invitation and can invite your family fellows.
3. Now they need to open their Apple account and need to log in with their Apple ID and password and need to accept the invitation.
4. Make sure to follow the on-screen instructions and your sharing account is ready.
For MAC:
1. Choose Apple menu > System Preferences.
2. Click Family Sharing.
3. Click Add Family Member, then follow the onscreen instructions.
If you’re using macOS Mojave or earlier:
1. Choose Apple menu > System Preferences, then click iCloud.
2. click Manage Family.
3. Click the add family member button (+), then follow the onscreen instructions.
Once you send the invitation, make sure to check the status of the invitation from time to time whether they accepted it or not.
These are the steps for sharing files and folders across your Apple devices.
If you have any questions in any of the above steps then you can write them down in the comments down below.
Make sure to carefully read each step and then proceed further.
Now, the question arises, is there any way to hide specific items from your shared contacts?
Well, the answer to this question is YES.
If you’re looking for a way to hide certain things from your purchase then the steps you’ll find down below are.
Read more:-
Locate Files I Received On My Digital Devices
Here are the steps:
If you’re looking to hide certain applications from your shared library then there are some basic steps that you may need to take in order to hide them.
1. First, you need to open the AppStore and need to click on your profile.
2. When you click on it, you’ll find several options. Make sure to click on the MY PURCHASE option.
3. Here, you can find all the applications that you’re already sharing with your family members.
4. Now, you need to select the application that you may need to hide from your family members. Make sure to tap the application and slide your finger slightly left.
5. Now, you’ll be able to see the HIDE option. Make sure to hit that button and your application will be hidden from your family members.
Hide applications in your MAC:
If you want to hide applications in your MAC OS then you need to take certain steps. Make sure to follow the steps I described below.
1. First, you need to open the AppStore and need to click on your profile.
2. If you’re not logged in then make sure to provide your Apple ID and password and log in to your app store.
3. Now, click on your profile and then click on the PURCHASED option.
4. When you enter this option, you’ll be able to see all your applications. Make sure to hover the mouse and find the three dots. Make sure to click on it and then you need to hit the HIDE button in order to hide the application.
These are the steps you need to take in order to unhide your applications in your iPhone, iPod, iPad as well as macOS.
If you have any questions in any of these steps then you can simply write them down in the comments down below.
Now, if you want to unhide the application then what do you do?
Well, make sure to stay with me and I’ll explain what you can do in order to unhide your hidden items.
Here are the steps for iPhone, iPod, and iPad:
1. Make sure to open your AppStore and need to click on your profile or Apple ID.
2. Now, you’ll see your account. Make sure to hit your account at the very top.
3. Now, you’ll be able to find an option called HIDDEN PURCHASES.
4. Here, you can find all of your hidden applications. Now, you can slide to the left and unhide these applications.
5. Once the application is unhidden, make sure to come again to your AppStore and search for the application.
Once found, make sure to click on the download button.
You don’t need to buy the application again. You can simply download it from there.
Here are the steps for macOS:
1. First, you need to open the AppStore in your macOS, and then you need to sign in if you’re not already signed in.
2. Now click on your profile and here, you’ll find view information.
3. Make sure to hit the Manage settings and here, you’ll be able to view all of your hidden items. Make sure to click on the three dots and unhide any application you want.
4. When you click on that, you’ll be able to view the application in your purchased list. Please click on the download button and your application will download again.
Read more:-
Convert Your Android Smartphone Into An ‘iPhone’
Are Paid Applications A One-Time Fee
Bottom lines:
Hope you guys found the article helpful. These are the required steps you need to take in order to hide and unhide the applications in your sharing group.
Make sure to follow the steps and if you have any further questions or anything you may have to share with us then you can write them down in the comments below.
If you find the guide helpful then don’t forget it to share with your loved ones, friends, and families.